Recently I have been asked to upgrade a standard issue mSATA SSD on Panasonic ToughPad FZ-G1 to 256GB SSD and clone manufacturer’s preload onto it. Task, as easy as it sounds, turned out not to be so straightforward after all. After deploying the image and booting onto the hard drive the OS would blue screen immediately after presenting Windows 7 First Time Setup language selection screen.
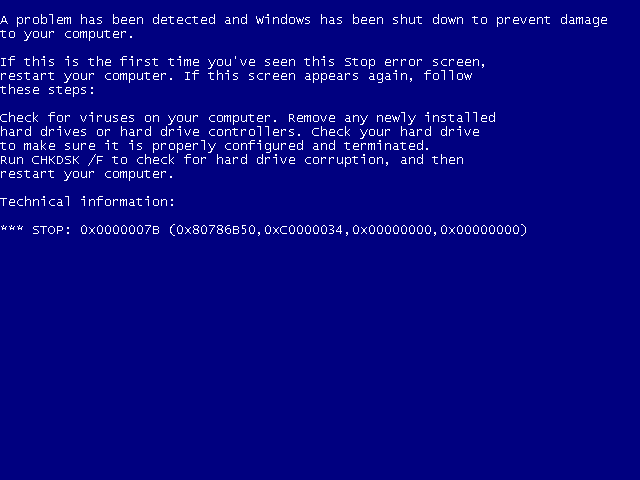
BSoD on every boot due to a dodgy driver? No problem!
Upon quick Google search I knew this is going to be a bit of a challenge – I came across many forum posts of people struggling to image these ToughPads, as well as a lot issues with BSoD while using Crucial M550 SSD.
Troubleshooting
After ensuring all BIOS setting are correct first obvious thing to check was to use alternative method of cloning the image. Using DISM and Symantec Ghost 11.5 yielded the same results, so cloning method was sound. I have tried reinstalling the OS using recovery partition, but results were the same. As mSATA drives have mind of their own next logical step was to upgrade the on-board firmware. The drive came with label pointing to MU01 firmware level, so I have upgraded it to MU02 (latest version available on Crucial’s website at the time). Results were still the same. Next, to rule out a hardware problem, I have deployed image onto my VM and since the problem persisted it must have been something contained within the image.
I have deployed clean version of Windows 7 onto the ThoughPad and that seemed to have worked just fine. Next I have downloaded driver pack from Panasonic’s website and started applying the drivers. It didn’t take long to find the offender – it was Intel Rapid Storage Driver. Now, knowing what is broken, it was time to fix it.
Problem resolution
The challenge with resolving the problem was unique state that Windows was in – it was still prior completion of First Time Setup and booting using Safe Mode was not an option since Windows will not allow you to use it until First Time Setup is completed. My best bet was to update Windows image offline in WinPE (Windows Preinstallation Environment). You can create your own bootable media with WinPE image by downloading Windows ADK (Windows Assessment and Deployment Kit, formerly know as WAIK – Windows Automated Installation Kit) from Microsoft’s website for free.
After booting onto my PE image first I had to identify where Windows partition has been mounted. If you have worked with DISM before it is the same thing as working with mounted WIM image but in this case we are updating image that has already been deployed, so no need to mount anything.
E:\>dir

 Volume in drive E is Windows
 Volume Serial Number is 4039-9053

 Directory of E:\

06/10/2009  01:42 PM                24 autoexec.bat
06/10/2009  01:42 PM                10 config.sys
05/14/2014  05:40 PM    <DIR>          Intel
07/13/2009  06:37 PM    <DIR>          PerfLogs
05/14/2014  06:05 PM    <DIR>          Program Files
05/14/2014  05:27 PM    <DIR>          Users
06/19/2014  09:27 PM    <DIR>          util
03/12/2015  07:52 PM    <DIR>          Windows
               2 File(s)             34 bytes
               6 Dir(s)  188,962,410,496 bytes free
So, knowing what partition Windows is residing on it was time to peek what makes it tick using DISM functionality of managing device drivers.
X:\Windows\System32>dism /image:e:\ /get-drivers

Deployment Image Servicing and Management tool
Version: 6.3.9600.16384

Image Version: 6.1.7601.17514

Obtaining list of 3rd party drivers from the driver store...

Driver packages listing:

Published Name : oem0.inf
Original File Name : prnms001.inf
Inbox : No
Class Name : Printer
Provider Name : Microsoft
Date : 6/21/2006
Version : 6.1.7600.16385

<!-- output omitted -->

Published Name : oem14.inf
Original File Name : iaahcic.inf
Inbox : No
Class Name : HDC
Provider Name : Intel Corporation
Date : 7/24/2013
Version : 12.7.3.1001

<!-- output omitted -->

Published Name : oem9.inf
Original File Name : iusb3hcs.inf
Inbox : No
Class Name : System
Provider Name : Intel
Date : 11/18/2013
Version : 2.5.3.34

The operation completed successfully.
The full output of the command is fairly lengthy and vaguely interesting, so I have trimmed it to the relevant part. The storage driver embedded into preloaded image – iaahcic.inf referenced to by Windows as oem14.inf – was the same driver version (12.7.3.1001) I have downloaded from Panasonic’s website and installed on clean version of Windows to re-create the issue. So it was time to get rid of it.
X:\Windows\System32>dism /image:e:\ /remove-driver /driver:oem14.inf

Deployment Image Servicing and Management tool
Version: 6.3.9600.16384

Image Version: 6.1.7601.17514

Found 1 driver package(s) to remove.
Removing 1 of 1 - oem14.inf: The driver package was successfully removed.
The operation completed successfully.
Now, having the driver removed, it was time to download newer version of the driver (12.9.0.1001) from Intel’s website and apply it to the image. Again, DISM proves invaluable tool for doing so.
X:\Windows\System32>f:

F:\>cd Panasonic\IRST\12.9.0.1001\f6flpy-x86

F:\Panasonic\IRST\12.9.0.1001\f6flpy-x86>dir
 Volume in drive F is WINPE
 Volume Serial Number is E211-5471

 Directory of F:\Panasonic\IRST\12.9.0.1001\f6flpy-x86

03/27/2015  07:47 AM    <DIR>          .
03/27/2015  07:47 AM    <DIR>          ..
11/21/2013  04:35 PM             9,631 iaahcic.cat
11/21/2013  04:35 PM             8,224 iaAHCIC.inf
10/28/2013  10:16 PM           489,832 iaStorA.sys
11/21/2013  04:35 PM             8,647 iastorac.cat
11/21/2013  04:35 PM             5,442 iaStorAC.inf
10/28/2013  10:16 PM            24,424 iaStorF.sys
               6 File(s)        546,200 bytes
               2 Dir(s)   1,169,915,904 bytes free

F:\Panasonic\IRST\12.9.0.1001\f6flpy-x86>dism /image:e:\ /add-driver /driver:iaAHCIC.inf

Deployment Image Servicing and Management tool
Version: 6.3.9600.16384

Image Version: 6.1.7601.17514

Found 1 driver package(s) to install.
Installing 1 of 1 - F:\Panasonic\IRST\12.9.0.1001\f6flpy-x86\iaAHCIC.inf: The driver package was successfully installed.
The operation completed successfully.
This time after rebooting machine has allowed me to complete First Time Setup successfully. As the issue has been resolved, I have re-imaged the ToughPad and shipped it to the customer. Since this was going to technical resources on the other side who will have to image many more of these devices, I have left the recovery image intact. If you are fixing your own image, best practice would be to mount recovery image found on hidden recovery partition, follow the same steps above to update recovery WIM and commit changes to the image.

You, sir, are a life-saver; I used this process to inject 64-bit RST drivers into a re-imaged Optane-based system and it was able to boot with minimal effort on my part! Thanks for posting an excellent how-to
LikeLiked by 1 person
Posted by Kevin in NM | 2021-08-19, 15:42